
Laser Cutting Instructions
- In Adobe Illustrator, ensure your document is in RGB Colour Mode
- Ensure your colour picker is also in RGB MODE
- Select the stroke Colour Menu (Click on the stroke colour picker box) OR: if you don’t see the colour menu, click “Window > Colour” or press F6 >
- On the box that appears, click on the three line button on the top right >
- Click on RGB
- Cutting Lines
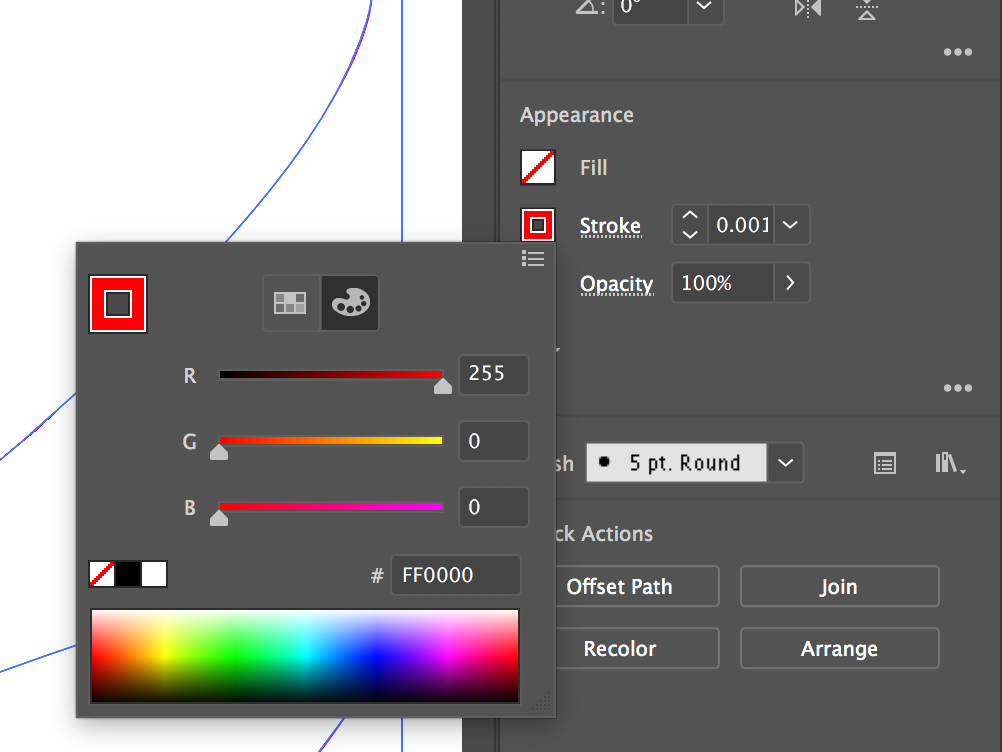
After drawing, or creating your object to be cut, any line that you want cut must follow these rules:Step 4: Engraving Objects Any objects/Shapes that you want engraved must follow these rules:- Stroke Colour: Must be 255 RED (R255,G0,B0)b >
- Fill Colour: Must be “NONE”
- Stroke Thickness: Must be 0.001
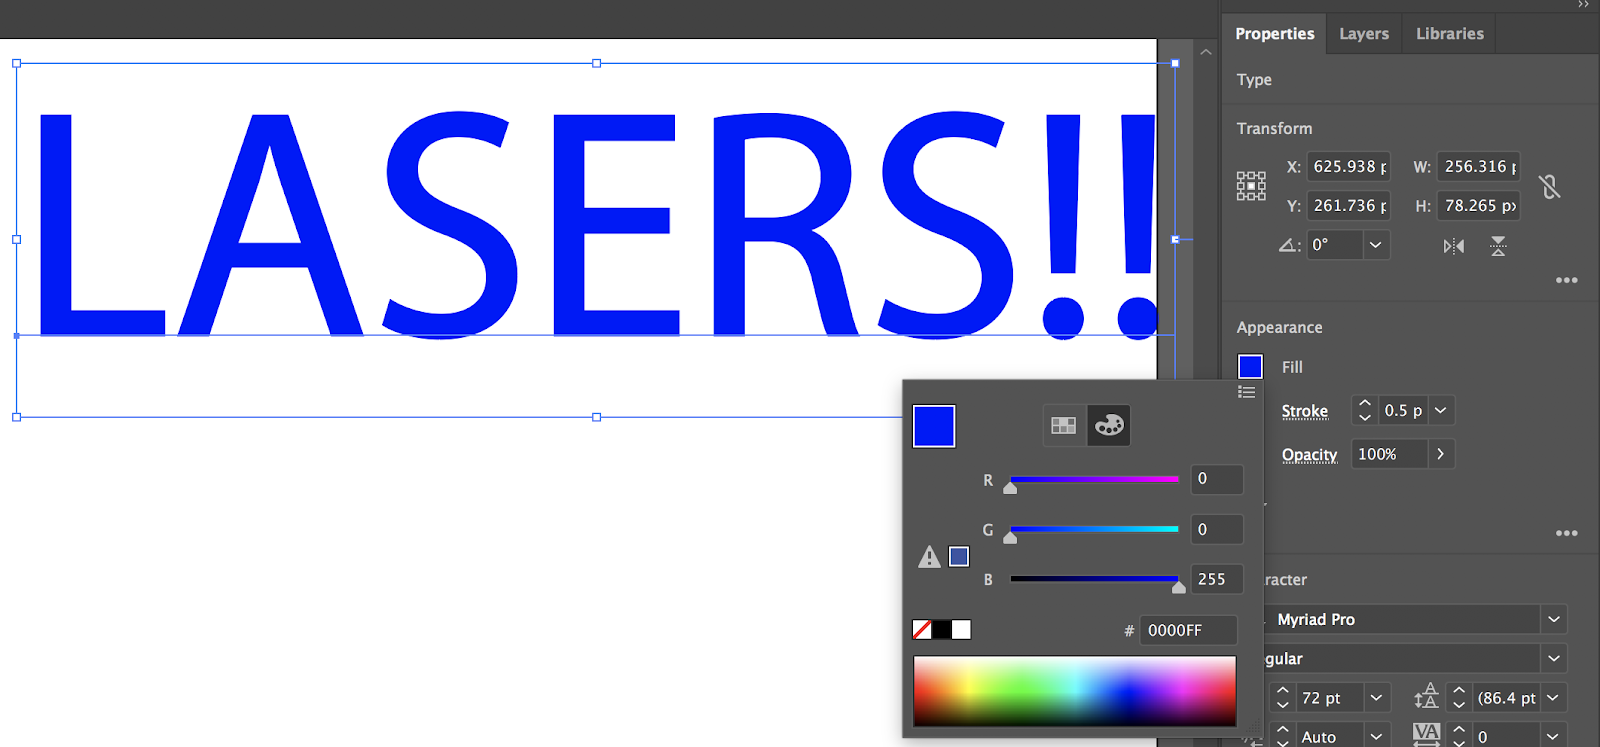
- Engraving Objects
Any objects/Shapes that you want engraved must follow these rules:- The Stroke and Fill colour must be set to RGB 255 Blue. (R0,G0,B255)
- Stroke must be set to 0.5 or higher


EXTRA: Dithering, Engraving images
Dithering takes a greyscale image and converts it to a collection of dots (Lots of dots will be black, small amount of dots will be light grey)
Converting your document to greyscale
- Ensure your cutlines are on a seperate layer from your dithered image
- Create your cutlines using step 3 in this document
- Lock your cutline layer before continuing on the next step
- After your colour document is finished, Select all objects (CTRL+A or COMMAND+A)
- Go to “Edit” Then “Edit Colours” and then “Convert to greyscale”

